

How To Draw A Deer Step By Step Easy
Create a wonderful Deer cartoon with like shooting fish in a barrel, step-past-stride instructions and video tutorial. Great for kids and beginner artists!
Jump to the step-by-step instructions.

Deer are a versatile and widespread species. Deer are native to every continent except Australia and Antarctica, and they inhabit climates ranging from jungles to forests and meadows to snowy tundras.
Male deer are chosen "stags" or "bucks", females are called "doe", and the young are known every bit "fawns".
Almost fawns are built-in with a spotted pattern on their fur, but developed deer of some species, such as the sika and chital deer, also wear spots.
Similarly, the males of most species sport antlers, or bony horns, while the females practise not - with the exception of the reindeer, in which both males and females have antlers. Once a year, deer shed their antlers to grow a new set.
Scroll down for a downloadable PDF of this tutorial.
Deer are known to symbolize grace, beauty, peace, and dignity. Would you similar to describe your very own deer?
Doing so is easy with the help of this simple, step-by-step drawing tutorial. All you will need is a pencil and a piece of paper.
Throughout this cartoon guide, new lines are highlighted in blue. Yous may also want to have an eraser handy to correct mistakes and erase guide lines.
Y'all may use paints, crayons, colored pencils, or markers to shade your completed cartoon.
If you liked this tutorial, see also the following drawing guides: Cartoon Squirrel, Penguin, and Turkey.

Click HERE to save the tutorial to Pinterest!
Footstep-by-Step Instructions for Drawing a Deer

Begin by cartoon a pocket-sized circle. This will form the deer'southward head.

Below the circumvolve, enclose an irregular shape with a apartment bottom. Draw a curved line across the bottom. This shape will become the deer'due south oral fissure.

Connect the oral cavity to the caput using ii curved lines.

From the back of the head and below the mouth, extend sets of short, curved lines that run across in jagged points. These lines will class the deer's furry neck.

Outline the deer's body using long, curved lines. Allow the lines to meet in a down-turned signal.

Draw the deer's front leg using a series of curved lines. Observe how the curves of the joints grade edgeless points, and how the lines converge inward but above the foot. Don't forget the shaggy detail of fur where the leg connects to the torso.

Draw the rear leg using a series of curved lines, paying similar attending to detail around the joints and human foot.

Describe the far front leg using a serial of curved lines.

Draw the far rear leg using a series of curved lines.

Enclose the shape of the tail using a series of curt, curved lines that meet in downwardly facing points. And so, draw short, curved lines running the length of the tail to add the particular of fur.

Using connected, curt, curved lines, depict furry detail extending downward the deer'south neck and across his belly. Employ curt, curved lines to add together more than fur detail to the shoulder.

Erase the guide line that crosses the legs and breadbasket.

To draw the ear, extend two long, curved lines diagonally from the head, allowing the lines to meet in a rounded point. Using a curved line, enclose an oval shape to add particular within the ear.

Echo this process to course the second ear on the other side of the head.

Erase the guide lines formed by the original small circle.

Side by side, you volition depict the antlers. Begin by extending a long, curved line upwards from the head. Extend a shorter line from the head, allowing information technology to diverge from the kickoff. Describe a third line, commencement at the tip of the second line and extending nearly to the outset line. From this point, describe another line parallel to the offset, once again allowing it to diverge. Repeat this process until you have completed the antler with multiple branches.

Echo this process of drawing parallel lines that diverge and co-operative to form the deer'southward other antler.
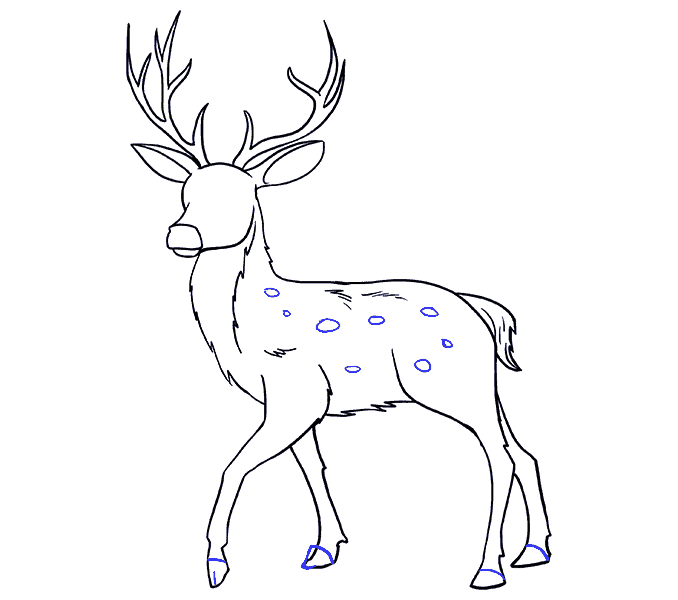
Draw a curved line across each foot to designate the hoof, and describe a short line upward from the bottom of the hoof to bespeak the carve up. Depict numerous, oval shaped spots of different sizes on the deer'due south body.

Draw two small ovals on the nose to indicate the nostrils. Draw two teardrop shapes to outline the eyes. Describe an oval within each eye, and a tiny circle within the oval. Shade between the circle and the oval.

Colour the deer. Virtually deer are tan or brown with white markings.
Printable Drawing Tutorial
Member TROUBLESHOOTING
Withal seeing ads or not being able to download the PDF?
Offset, check that you're logged in. You can log in on the fellow member login page.
If y'all're still not able to download the PDF, the likely solution is to reload the page.
Yous can do this by clicking the browser reload button.
Information technology is a circular pointer-shaped icon at the tiptop of the browser window, typically constitute in the upper-left side (you can also use keyboard shortcuts: Ctrl+R on PC and Control+R on Mac).

Source: https://easydrawingguides.com/how-to-draw-a-deer/
Posted by: smithmisho1978.blogspot.com
0 Response to "How To Draw A Deer Step By Step Easy"
Post a Comment